
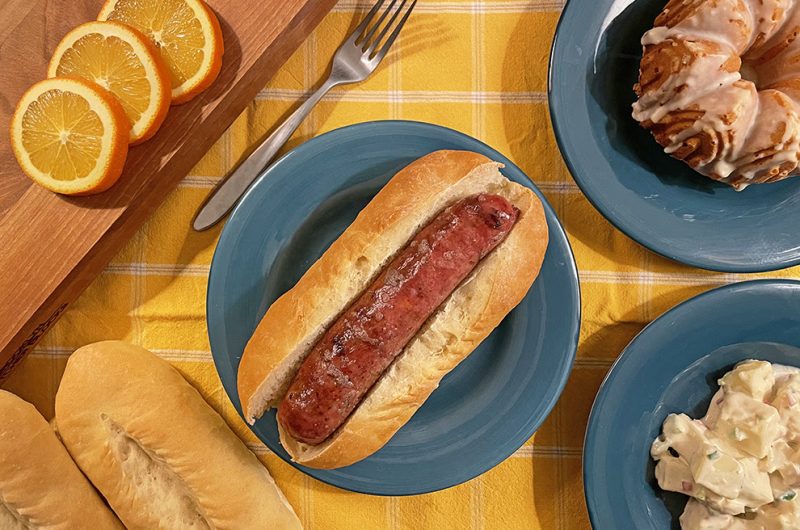
Sausage on Fresh Hoagie Roll
For the Sausage (grill or cook using method of your choice)
For Grilling: Place the sausages on a grill grate over indirect heat. Cook with the lid closed for fifteen minutes. Flip the sausages, and check their temperature. Continue grilling until the internal temperature measures 160°F. If the sausages aren’t browned enough, move them over the direct heat (one of the lit burners) and grill, watching carefully for flare-ups, until each reaches the desired color. Serve on hoagie roll with condiments of your choice.
Cook Mode
Keep the screen of your device on
Ingredients for hoagie roll
5 cups 5 bread flour
4 teaspoons 4 instant yeast
1 tablespoon 1 salt
2 cups 2 water, room temperature
3 tablespoons 3 vegetable oil
1 large 1 egg, room temperature
4 teaspoons 4 sugar
Directions
- Whisk 5 cups bread flour, 4 teaspoons instant yeast, and 1 tablespoon salt together in a mixing bowl.
- In a separate mixing bowl whisk together 2 cups water, 3 tablespoons vegetable oil, 1 large egg, and 4 teaspoons sugar until the sugar has dissolved.
- Beginning with a spoon (or in a stand mixer with dough hook) mix the wet and dry ingredients together, until a dough starts to form. Once a dough starts to form use your hands to continue mixing and kneading for about 8 to 10 minutes. The dough should be smooth and elastic.
- Transfer the dough to a lightly floured counter space and knead for 30 seconds more before forming into a smooth, round ball.
- Place the dough ball into a lightly greased large bowl and cover tightly with plastic wrap. Let rise until doubled in size, about 1 to 1/2 hours.
- After the dough has doubled in size, gently deflate the dough and then transfer to a counter space. Cut the dough into 8 equal pieces and cover loosely with plastic wrap.
- Working with one piece of dough at a time, press into a 4 inch by 4 inch square.
- Then fold the upper quarter of the dough into the center and press down gently to seal in the middle. Repeat the process by now folding the bottom quarter of the dough into the center and pressing down to gently seal.
- Now fold the dough in half and seal the edge as best as possible.
- With the seal facing down, cup your hands around the dough and roll back and forth without pressing down.
- Stretch and roll the dough into an 8 inch cylinder with slightly tapered ends.
- Arrange the hoagie rolls on two parchment-lined rimmed baking sheets, leaving at least 3 inches between each roll.
- Cover and let rise until nearly doubled, about 3o minutes to an hour. The dough should spring back minimally when poked gently with a finger.
- With oven racks in the lower-middle and upper-middle positions, preheat oven to 350°F degrees.
- Using a knife, make a 1/4 inch deep slash along the center of the rolls starting and stopping about 1/2 inch from roll ends.
- Bake rolls until golden brown about 30 – 35 minutes. Rotate pans halfway through to get an even bake.
- Let cool on a cooling rack for at least 1 hour before serving.